You may find while you are running a vector job that certain lines or segments will slow down quite a bit, charring the material. We typically see this with designs that have duplicate vector nodes resting on top of each other or if you have a vector line that is for the most part straight but each node has a "bezier curve" , which the software will issue at times, knowing how to follow the line with a steady speed.
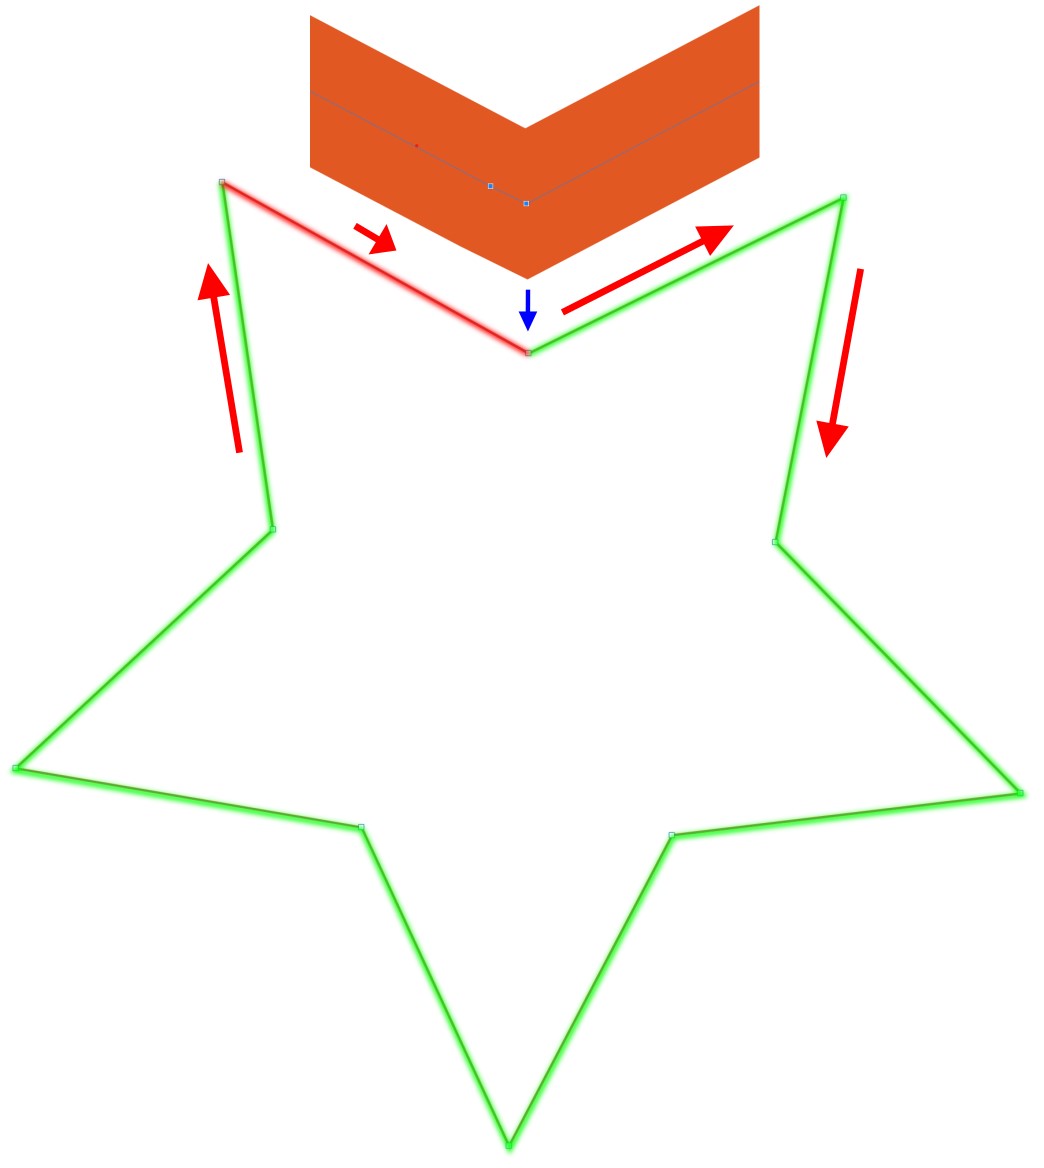
Let's take the below simple design as an example

Let's say you were to run this job and all lines cut at a fast speed but one line shown in red below was much slower and burning your material. The orange section is if you were to zoom in to that node where the blue arrow is pointing and there are two vector nodes right on top of each other, simply deleting one of these nodes would solve the issue but it would be nearly impossible to see this issue until AFTER you run the job which is not acceptable as lead to ruined material.
Change Laser Trajectory Mode
The quickest method on solving this without adjusting your designs would simply to change the Laser Trajectory Mode from "Fast" to "Exact" which will handle the method the software uses to calculate the path the laser head will take and does a better job on handling vector nodes on top of each other.

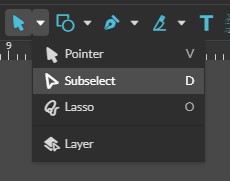
This would be the best method to overall correct the issue without needing to examine the files in detail. If you do see this occur on a piece of material after this point you can use the Subselect tool to focus on the nodes along the line that slowed down to move each node out of the way to locate or any duplicates and delete them.
Still having Issues?
Please create a Support Ticket by using the button below or sending an e-mail to support@fslaser.com stating you've done all previous troubleshooting steps.
- When submitting via an e-mail you may attach any pictures, videos and project files needed for support to see.
- When submitting a ticket using the button below please either respond to the automated generated email stating we have received the ticket with your pictures, videos and project files or upload these to a Google Drive or Dropbox folder and include this link within the support ticket "Your Issue" dialog upon creation.
![]()