
Laser Engraver Test: Dial-in Your Settings
So you’ve just got your new laser cutter and engraver, and you want to start engraving some awesome photos or designs onto your materials. Once you get your image or logo imported into the software and are ready to begin engraving, you’ll notice a lot of settings and options that you need to work with before you can begin. Don’t worry. While it may initially seem quite confusing, you’ll be up and running with your engraving in no time once you learn how to run the proper laser engraver test so you can proceed from here.
Laser Engraver Test: What are the settings?
One of the most common questions that we receive is “What are the settings for <insert your material here>?” And honestly, because of all the variables there’s no exact number or value that can be given. These variables range from the physical features of your machine, such as the power of your laser tube and how well your mirrors are aligned, to other factors that may be out of your control like humidity, temperature, and material variances.
When you consider all these variables that can affect the way your laser engraves, you’ll understand why we are unable to give you exact settings for your materials. Instead, we offer a couple different ways that you can test your material in your laser engraver so you can make sure you get the exact results you want.
Laser Engraver Test: The Options
There are going to be a few different ways that you can run a laser engraver test on your materials. Those options will be outlined below, and you can decide which will work best for you and your workflow. Just make sure you get extra materials ahead of time if you haven’t ever worked with it before so you can run a laser engraver test.
The Quick Method:
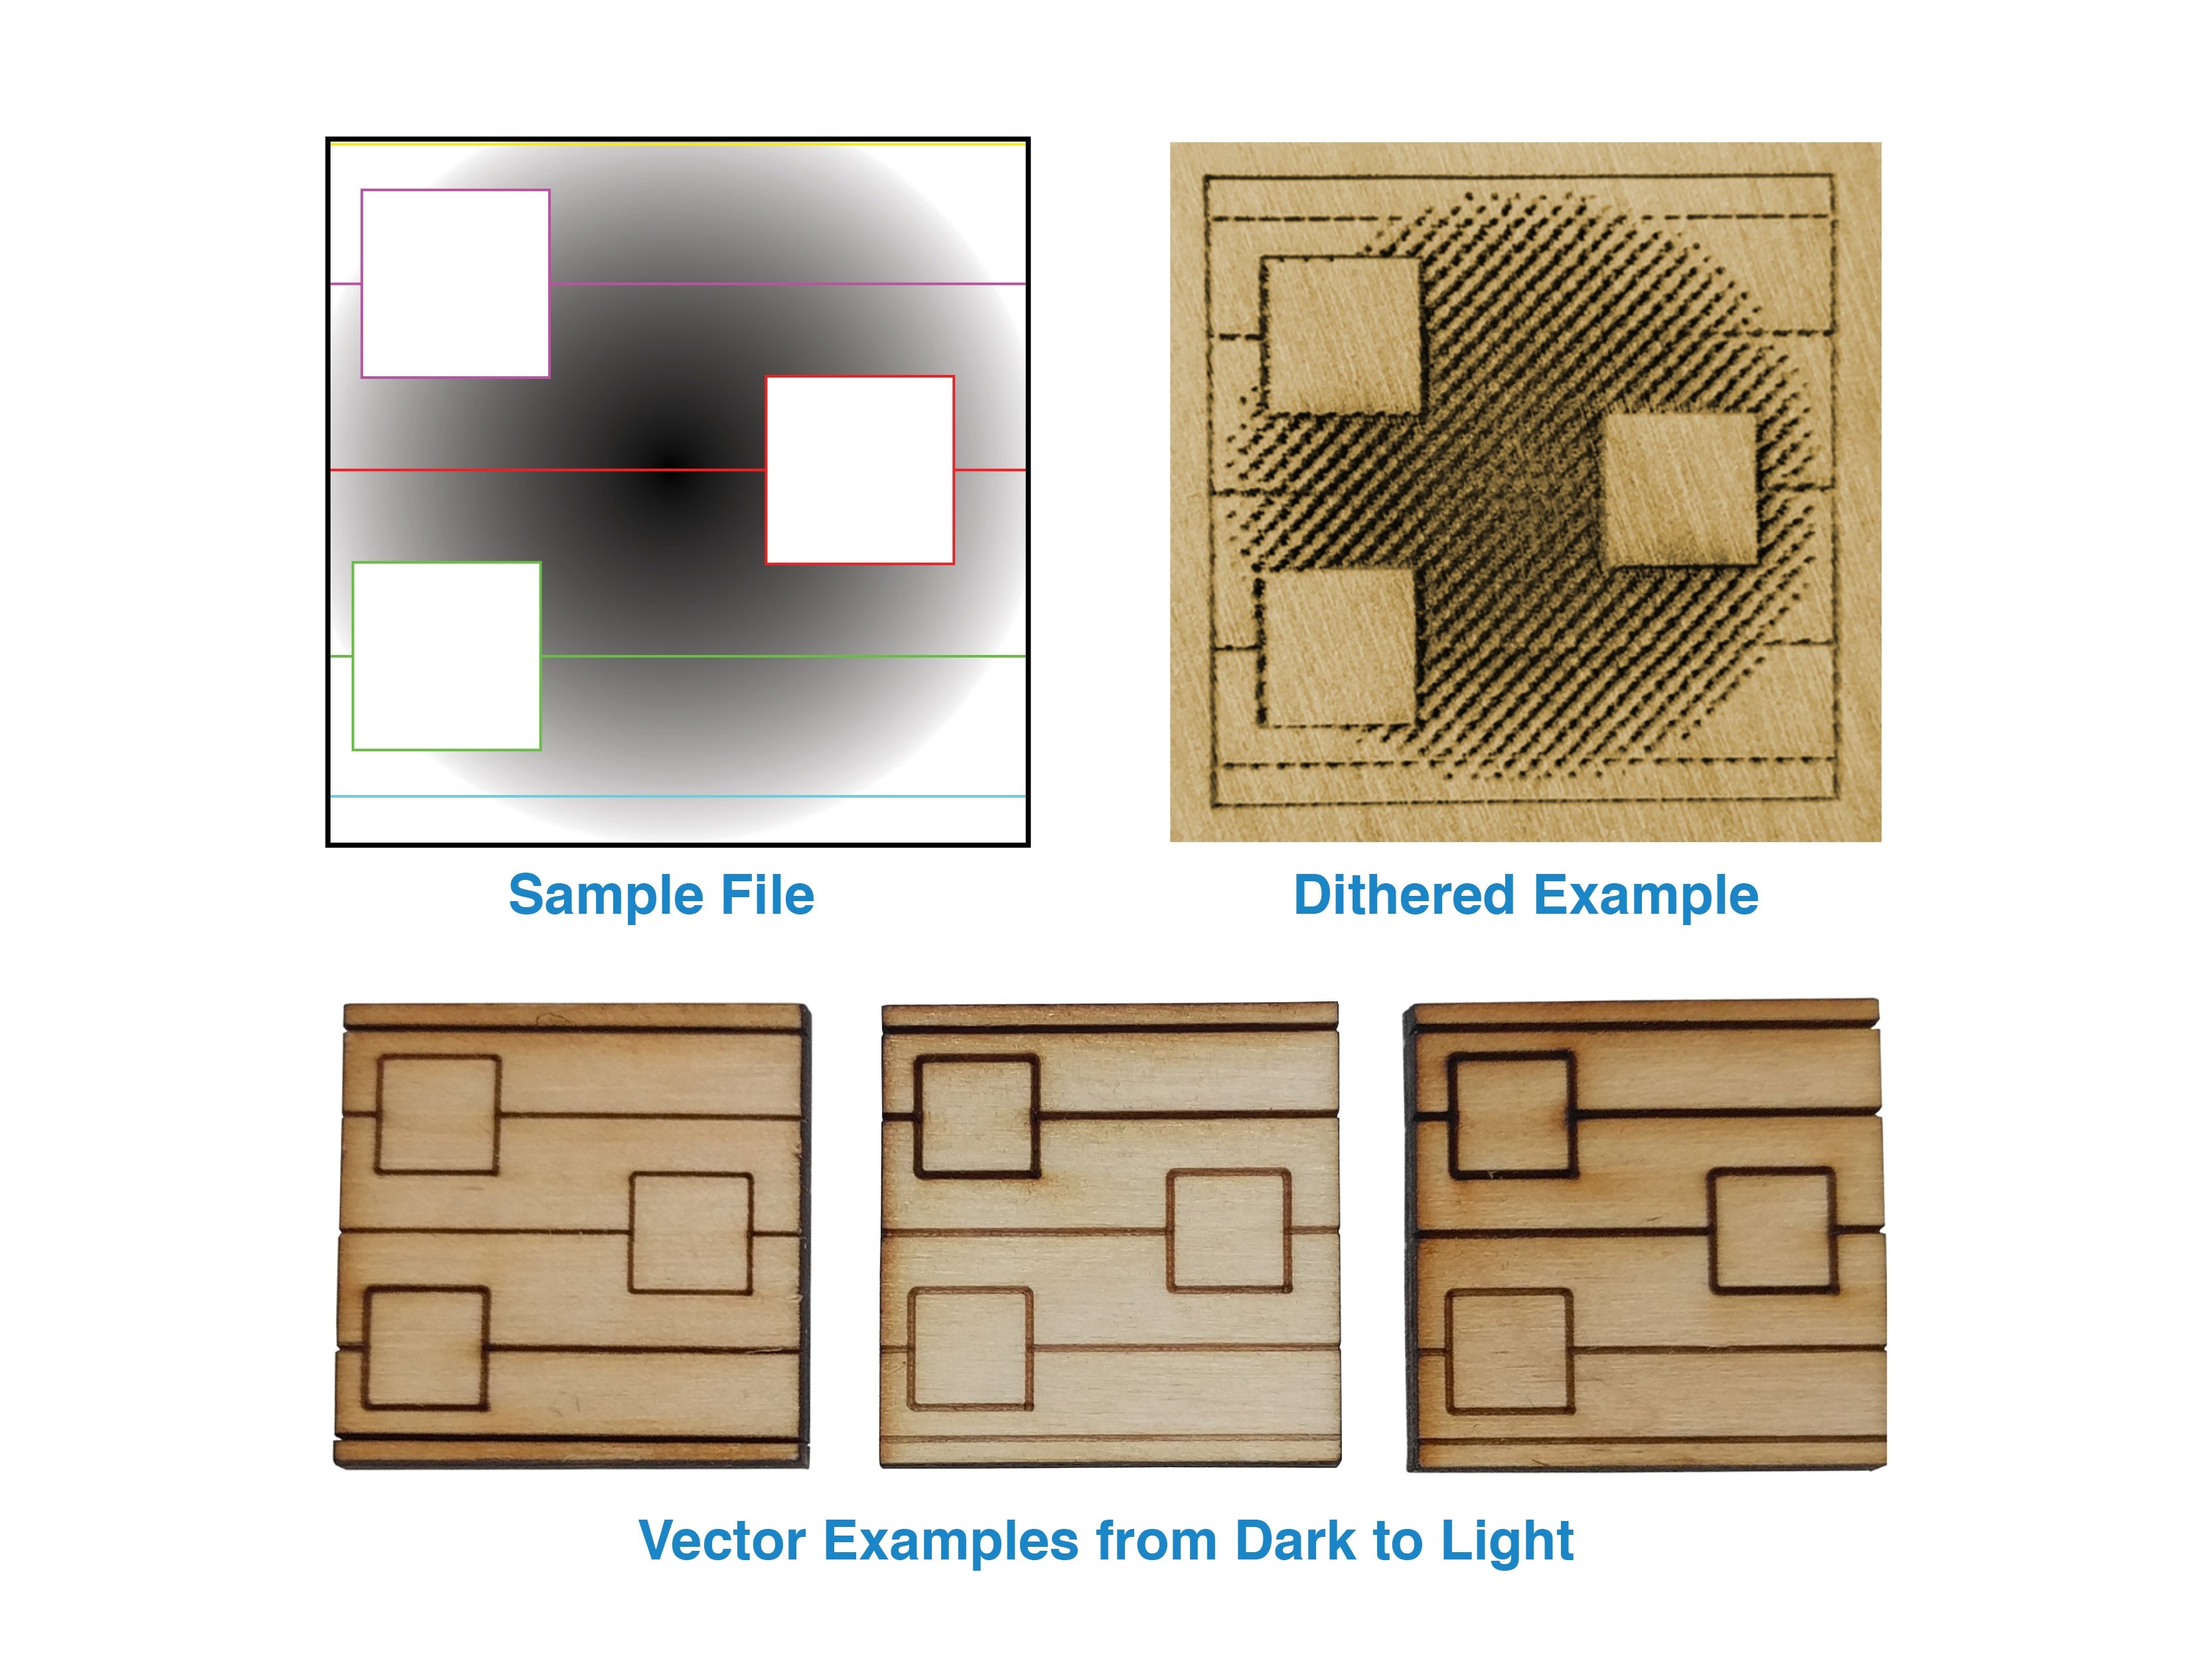 If you are constantly on the go and you’ve got a fresh piece of material that you aren’t familiar with, you can quickly use this method to figure out what settings you should use. This is the original method that we have always used, and it will help you do more than just figure out the settings for engraving. For our laser engravers, this original material test file is included in every copy of RetinaEngrave v3.0 (RE3) software that is pre-installed on your laser system. You can access this file by navigating to the “Clip Art” tab which is located at the top of the left menu in your RE3 software, or you can download the file here and import it into RE3.
You’ll notice that this file also has a bunch of vector settings options which will allow you to test the vector options as well, but for now we are going to use this file to test the raster/engraving settings . So on the left menu, you’ll want to hide all the vector paths so the laser can focus on the engraving only. From here it will be a simple method of trial and error to figure out what settings you want to use. For example, if you try some settings and you find that it is dark and the gradient is not visible, then dial back the speed. Or if you see a gradient, but you think the engraving is too dark, dial back the power. After a few tries, you should be able to get these settings figured out so you can begin your engraving.
The Detailed Method:
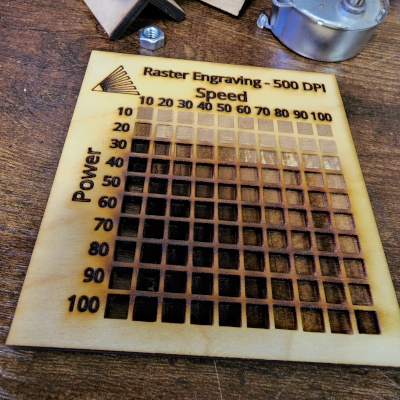
This method is going to take much longer than the previous method that was described, but it will give you a grid of options that you can compare. This method engraves a 10x10 grid of squares in a variety of power and speed, which is why it takes so much longer. You will not be required to practice any trial and error since you’ll get every option in one file. You can download the file here, then just import it into RE3.
The biggest drawback to this method is that it will not utilize any gradients, so you will not see how well the settings blend from light to dark. So if you have the time, and want to find the perfect settings, start with the detailed method as your initial reference. Once you find the best settings using this method, then move on to the quick method and use those settings to make sure the gradients will work, and make adjustments as needed.
Laser Engraver Test: Record your settings
A test log is available to download from our Materials Test page. Once you figure out the best settings for that material, write it down in the log so you can easily reference it for future projects. This will save you the time and materials, and prevent you from having to repeat the process in the future.
Laser Engraver Test: Review
All these tests and logs are available for download, along with detailed instructions on how to use them to achieve the best results. So the next time you find yourself asking what settings to use, you can use these tests to find out. Or if you have previously used the materials and recorded it in the log, then it will be as simple as inputting the settings you have recorded.
If you find yourself using the same settings, but getting different results, take a look to make sure there aren’t any variances in the materials that could be affecting how it is getting engraved, and if that looks fine, then check to make sure your optics are clean and your mirrors are aligned correctly. There may be a chance your laser tube is wearing out or there is some other problem. We have support technicians who can help you troubleshoot and make sure your machine is working properly.
Full Spectrum Laser is a leader in easy to use, highly versatile laser cutting and laser engraving machines. Our systems range in size from desktop units and high-volume machines through industrial-grade production equipment. Our machines are running all over the world: from grade schools to National Labs, garage startups and many Fortune 500 companies. Contact us today to learn more.