CO2 Laser Repair Services or Self- Troubleshooting?
Consider this scenario: You are busy going about your day to day activities and using your laser cutter and engraver as part of your workflow. Your CO2 laser cutter and engraver has been working just fine, but when you went to use it today, the laser head would move as if it were going about its job, but it wasn’t leaving any marks on your materials. Now you are wondering if you can address this on your own or do you need CO2 laser repair services?

Having a tool vital to your daily workflow that suddenly has an issue like this will put a sudden stop to your process. You may not be able to move on until it is fixed (which can be a big problem if it is a business vital tool). Luckily, when you find yourself in this situation, the solution can be very simple.
Before you can begin, you want to make sure you are calm and aware of your surroundings. The last thing you want is to cause more damage to your system while furiously trying to figure out what is happening, or worse, you may end up hurting yourself. Safety is paramount, so you will want to make sure that you approach any troubleshooting process with a reserved and calm demeanor.
In this article, we are going to outline the most common troubleshooting procedures. If you find yourself in a situation where your CO2 laser cutter isn’t working as it should, you can use these steps as a first stage of troubleshooting.
Clean the Mirrors and Lenses
If you have been encountering problems where it seems like your laser tube is losing power, the first thing you should check is to make sure that all of your mirrors and lenses are clean. While using your laser, the smoke and fumes will leave dust and deposits on your lenses and mirrors which will inhibit the path of the laser. Make sure you use an optical grade cleaning wipe and clean every mirror in the laser path to make sure they are 100% reflective, then clean both the focus lens and the beam combiner lens to make sure there is no dust or residual deposit on them as well.
Cleaning the lenses and mirrors in your CO2 laser system should be a process that is completed often as part of the regular maintenance cycle. But it is understandable that you may get busy and have longer intervals between cleaning and maintenance than normal, or you may have worked with materials that produce more smoke than others which produced a higher amount of buildup on your optics.
Check the Alignment
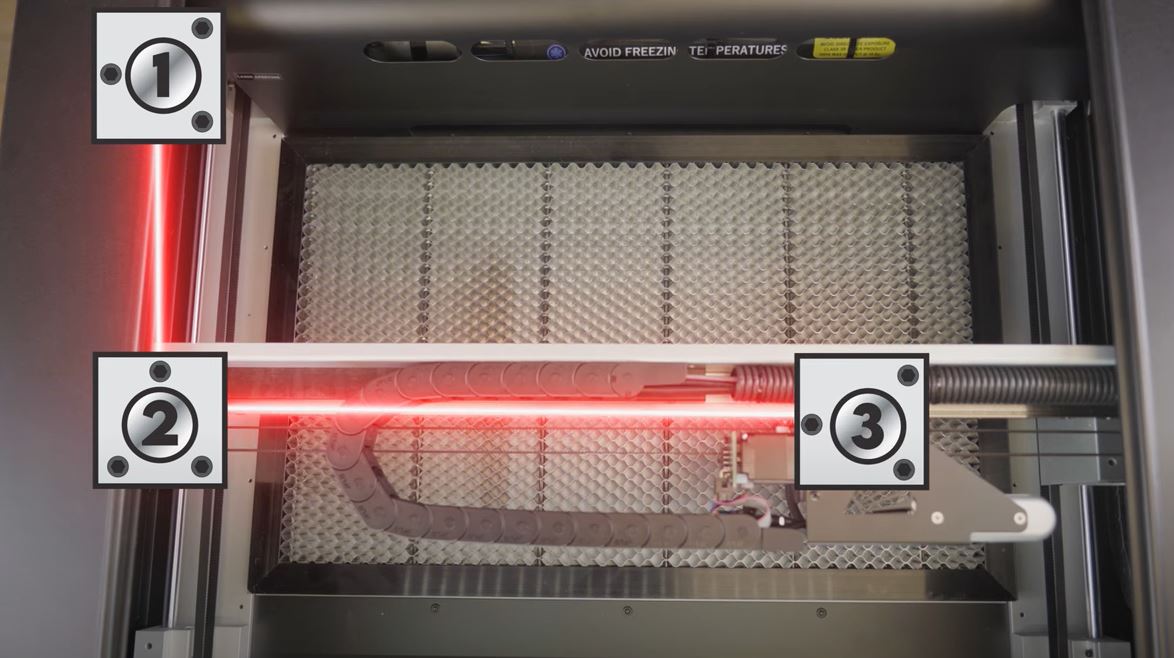
If cleaning the optics along the laser path did not fix your power issue (or only partly fixed it), the next thing you should check is the alignment. Over time, the gaskets holding the mirrors in place will wear out, or even the small vibrations that happen with normal usage will cause the mirrors to shift slightly. Even the smallest shifts in these mirrors can cause significant changes to the alignment. When your laser is out of alignment, you’ll notice the laser losing power the further away the laser head moves from the home position in the back left of the workspace.

To test the alignment, get a piece of thermal paper and put it in place on top of the focus lens. Now move your gantry so it is at the back-left of your workspace, and do a test fire. Leave the thermal paper in place and repeat this process in each corner of the workspace. After you have test fired in each corner of the workspace, pull the thermal paper out and examine the results. If your laser is aligned, there should only be one black mark on the thermal paper. If you see multiple black dots, this means the laser is not aligned and you need to align your mirrors.
If both cleaning the optics and aligning the laser do not fix your laser power issues, then your tube may be losing power and might need to be replaced.
Check your Sensors
There are a series of fail-safe measures that are designed into the functionality of your laser system that will prevent the laser from firing if it detects that there could be a problem that could damage your laser tube or inflict harm on the user.
When these sensors detect that something isn’t right, it will turn off the power that is being supplied to the laser tube, but the gantry will still move like it’s running the job. If this happens to you, the lid sensor and the water sensor are the two that you’ll need to check. On our laser machines, you can check the status of these sensors in the status bar at the bottom of the 7 inch touch screen, or in the toolbar located at the bottom of the RetinaEngrave v3.0 software. You’ll want to check to see if either of these sensors is showing as red, which means it will be turning off the power to the tube.
If the water sensor indicator is red, then first check your water supply. Make sure there is enough water in your system and that the water pump is flowing properly. You can easily feel the flow of water by slightly pinching the silicone lines running into the back of your machine. If the water feels like it’s flowing properly, then the sensor might not be functioning properly and will need to be cleaned or serviced. If you are using a Muse Series CO2 laser cutter, then this sensor is located inside the laser machine and can be easily cleaned by removing the screws on the side of the sensor which will give you access to the impeller inside. Just make sure you have the laser system and the water pump turned off before pulling this apart, and always have a towel on hand just in case you spill water. If you have a P-Series system, then you’ll need to check to make sure the alarm cable that goes from your laser to the chiller is connected.

If you notice that the lid sensor is red, this indicates that the laser does not detect that the lid is closed. On the Muse Series, make sure the magnet that is on the lid is properly placed, and verify that the sensor that it contacts has not fallen or become disconnected. If you have a P-Series, you can check the same thing, but also notice if the sensor on the machine side needs to be angled slightly so it can properly read the magnet.
CO2 Laser Repair Services: Ask for Help

These are the most common issues that can be easily fixed with some basic troubleshooting. Understanding these things, along with a proper maintenance and cleaning schedule, will help keep your laser in peak working condition. If these basic troubleshooting steps don’t fix your issue, then you may need more assistance including CO2 laser repair services. FSL has an amazing community that strives to help each other out. So make sure to check out the Full Spectrum Laser Community Forum on Facebook. Also, we have a dedicated team of support technicians who can help you out. Even if your machine is out of warranty, they are here to help in any way they can.
Full Spectrum Laser is a leader in easy to use, highly versatile laser cutting and laser engraving machines. Our systems range in size from desktop units and high-volume machines through industrial-grade production equipment. Our machines are running all over the world: from grade schools to National Labs, garage startups and many Fortune 500 companies. Contact us today to learn more.

